The latest version of Tropy introduces a new project type designed to make Tropy projects more portable and greatly reduce instances of broken paths between images and project files. When creating a new project, Tropy now prompts you to choose from two project types: Standard or Advanced, as you can see below.
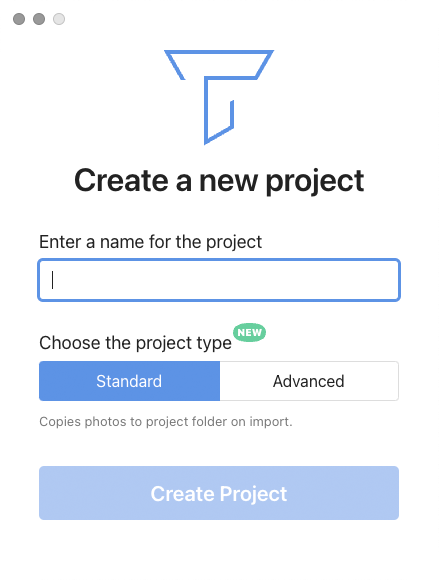
The default option for new Tropy projects now creates a Standard project (.tropy) with a branded folder (Windows/Linux) or bundle (Mac OS) containing copies of any images imported into that project. In addition to making a Tropy project and associated images much more portable between users, a Standard project also allows the user to access and annotate images without needing to consolidate from the original. This marks a change from previous versions of Tropy where projects pointed to original image files, which could sometimes result in broken paths if image files got moved around on your hard drive.
If you prefer to continue managing photo locations on your own, you can opt to create an Advanced project (.tpy). Advanced projects are, in essence, “classic mode” for Tropy, which gives users full control on how to manage their image files. In Advanced projects images continue to be linked to the project through absolute or relative path, but the project file itself only retains data added to images in Tropy. If the original photos are moved or the path is otherwise broken, Tropy will need to consolidate items in order to visualize them correctly, as in previous versions. The Advanced project provides a more flexible approach to managing your images. For instance, in an Advanced project you can have the photos in multiple locations or keep using a specific folder structure; for larger projects you can split up the photos and keep some on an external drive to save hard disk space.
From the updated Tropy Preferences panel, when editing the Project Settings it is also possible to convert Advanced projects (existing .tpy projects you may have) into the new Standard project type, automatically making copies of all imported, consolidated photos and placing them in the new Standard project’s folder. See new Project type “Convert” pencil button displayed below:
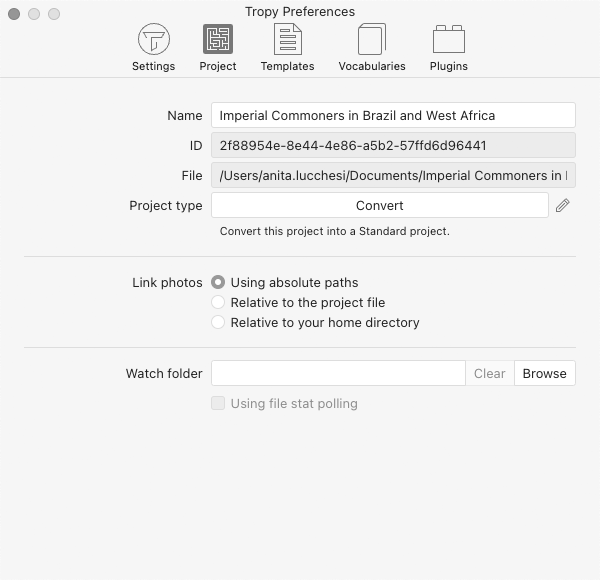
Click the pencil icon to reveal the Convert button.
In both project types, Tropy still does not modify the original image files. Any edits or transformations that you make in Tropy are just layered on top of the original images, as before. With Standard and Advanced projects, users may export original-quality versions of the images as they appear in the projects in PDF and JSON-LD formats. Standard project files can also be shared with other Tropy users. (If a project uses a customized metadata template, other users will still need to import that template separately into their Tropy installation in order to display the metadata in the same format.) We hope you will enjoy the new project types in Tropy 1.13. If there are any issues, as always, we are happy to take your questions on our forums.